


28. March 2026
How to Create and Manage Blog Posts
Blog articles on a website serve several practical functions. First, they are a good place to document activities and events; second, they can be used to provide further information on topics related to the website; and finally, they are an effective means of optimizing the website's ranking on search engines.
With our blogging-feature, you can create, edit, publish, as well as unpublish and delete blog posts for your website. To make onboarding easier, this process is explained in the following paragraphs.
Create a new Blog Post
To create a new post, simply click the "New Blog Post" button in the header of the blog post overview page. This will load the post editor and enable you to edit, save and publish your post. If you want to leave and go back to the overview page, press "Back to Posts" in the upper left corner.

Edit the Blog Post
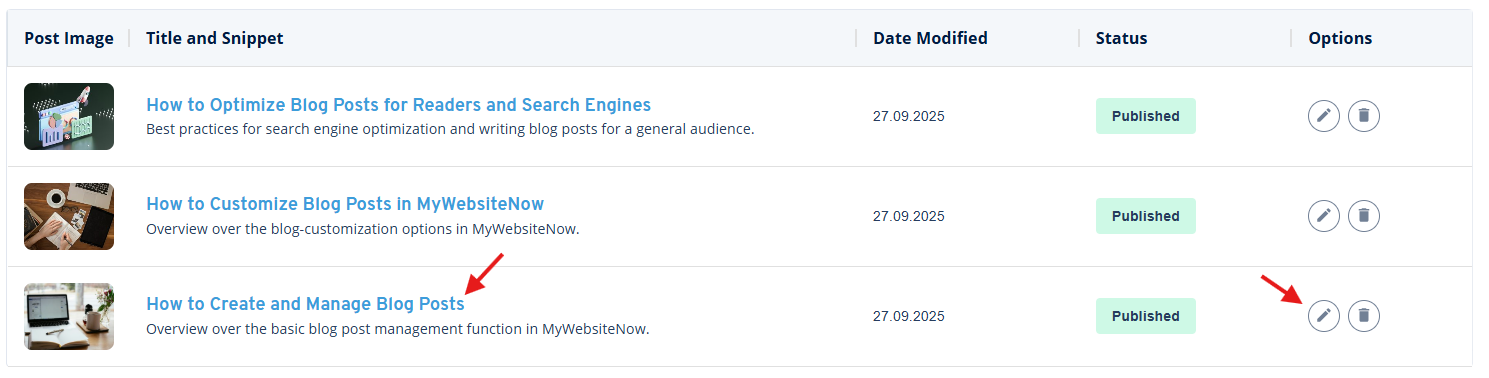
If you have already created a post, you can access it in the overview page, by clicking on the headline of the post or on the pencil icon on the right side of the column. If you want to know about the customization options available in MyWebsite Now, be sure to check out our blog post "How to Customize Blog Posts in MyWebsite Now".
Save the Post without Publishing
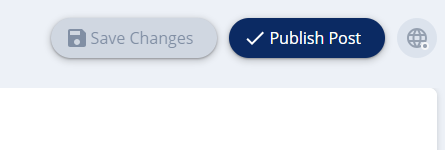
Oftentimes writing a post takes more than one sitting. This is not a problem, as you can either press "Save Changes" on the top right before exiting the page or press Ctrl + S on your keyboard. A brief "Saved" will appear to let you know that the current state of your work is saved for later. If "Save Changes" is greyed out (like in the picture below), that means that all changes have been saved and you can safely exit the blog post. Additionally, the editor occasionally saves your progress automatically.
Publish and Unpublish the Blog Post
Once you are satisfied with the content and scope of your post, you can press the "Publish Post" button in the top right corner. The publishing of blog posts works differently compared to the rest of MyWebsite Now. Blog posts can be edited and published directly within the blog. In contrast, individual pages still require a full site publish to update changes. Conversely, this also means that publishing or updating a post does not affect the rest of your site.
If, at one point, you want to take down a post after it has been already published, you can click on the globe icon next to "Update Post" and press "Unpublish Post". This will return the status from "Published" back to "Draft", enabling you to make changes and re-publish it at a later point in time.
Delete the Blog Post
In certain situations it can be helpful to delete a post after you have created it. To do so, click on the bin icon on the right site and confirm the following popup. Your changes will be applied automatically, updating your website and overview page.
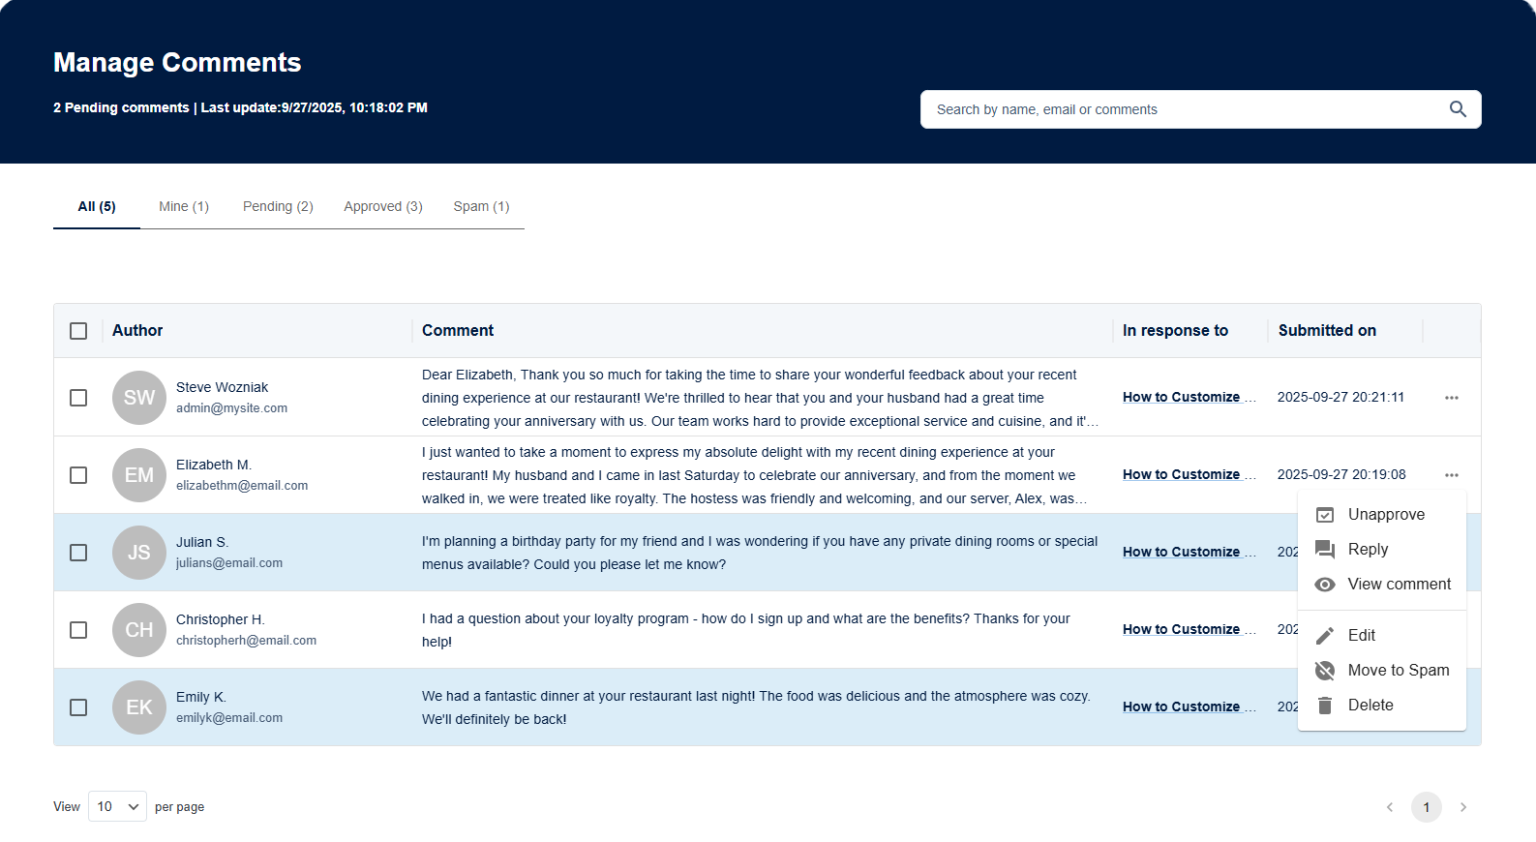
Manage Comments for your Posts
For every blog post, you have the option to enable and disable the possibility for your visitors to leave comments under your writing. Before they are published and visible under your post, you need to review them after receiving a notification email.

For every comment you receive, you have the option to approve, slightly edit or simply delete or move to spam. After approval, you can also reply to the comment to stay in contact with your visitors. Your replies can be posted in your own name, which can be chosen in the settings tab. There you can also disable comments for newly created posts.
What's Next?
Now you should have everything to create and manage your blog post in MyWebsite Now.
If you want to know what tools are available to individualize your blog posts, be sure to check out our post "How to Customize Blog Posts in MyWebsite Now".
If you want to learn about ways to make the most out of your blog posts, this might be the read for you: "How to Optimize Blog Posts for Readers and Search Engines".